Installing the LandingZone Ethernet Driver for macOS Big Sur and Monterey
For the 12-inch LandingZone, LandingZone DOCK, and LandingZone 2.0 PRO
Establishing an Ethernet connection through the LandingZone requires the installation of the LandingZone Ethernet Driver.
Note: If you already have a version of the LandingZone Ethernet Driver installed on the MacBook, please uninstall the driver by following these steps before installing the latest LandingZone Ethernet Driver.
How to Install
Step 1: Before installing the LandingZone Ethernet Driver, undock the MacBook from the LandingZone, unplug the Ethernet cable, and unplug the LandingZone Power Adapter.
Step 2: Download the .zip file containing the LandingZone Ethernet Driver from this page or the Download Drivers page.
Step 3: Double-click on the LandingZone Ethernet Driver .zip file and a folder will be extracted.
Step 4: Double-click “ASIX_USB_Device_Installer_vX.X.X.dmg” file in the extracted folder. A Disk Image device titled “ASIX_USB_Device_Installer” will appear in Finder (under devices) and also on the Desktop.

Step 5: Double-click on “ASIX_USB_Device_Installer_vX.X.X.pkg” and a driver setup dialog will appear. Follow the instructions to install the Ethernet Driver.
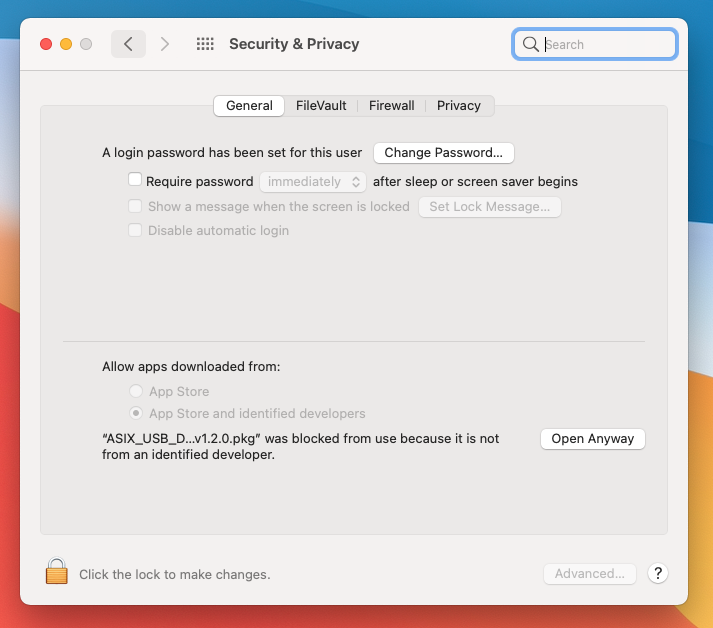
Step 6: When attempting to open the “ASIX_USB_Device_Installer_vX.X.X.pkg” you may run into the following error message “ASIX_USB_Device_Installer_v1.2.0.pkg” can’t be opened because Apple cannot check it for malicious software”. When this message appears, click “OK” and go to System Preferences -> Security & Privacy -> General. You should see the following message “ASIX_USB_D…v1.2.0.pkg was blocked from use because it is not from an identified developer.”. Click on the “Open Anyway” and then click on “Open” in the subsequent pop-up menu in order to run the installer.
Step 7: Under Installation Type, click [Install] to continue the operation. You might need to enter your MacBook computer’s username and password during this step based on your personal computer settings. Enter them if you are prompted.
Step 8: Restart the macOS system by clicking [Restart] if prompted during the installation process.
Step 9: Go to the Launchpad and find the newly installed program called “ASIX_USB_Device_App” and launch it.
Step 10: In the ASIX USB Device App, follow the “Installation Flow” to turn on the Ethernet Driver.

Step 11: After the Ethernet Drive is activated, connect the LandingZone Power Adapter, Ethernet cable, and then dock the MacBook to the LandingZone.
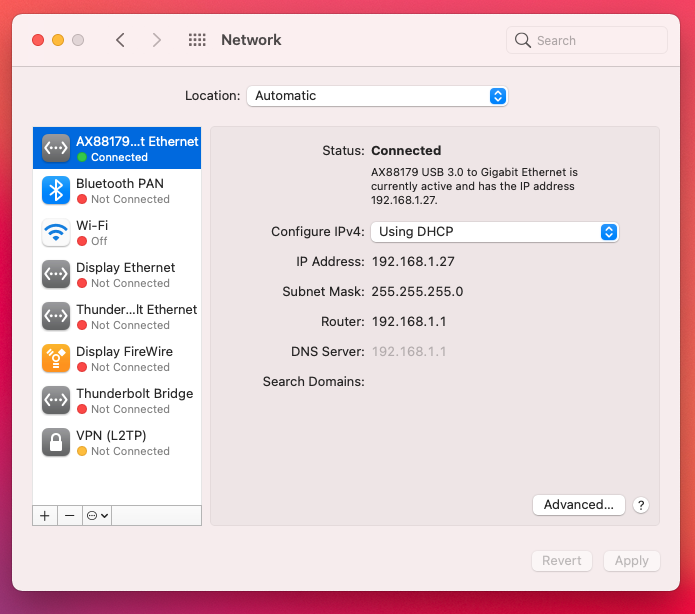
Step 12: Go to the Network Settings in the System Preferences and the AX88179 Ethernet connection should appear as “Connected” on the connections list to the left. It should display as “AX881…thernet” with a green dot next to it, as shown in the image below. You should also be able to see the IP address, router, subnet mask, DNS server, and Search Domain(s).
Step 13: If the AX88179 Ethernet is not shown on the connections list, add the interface by clicking the“+” icon at the bottom of the list. Under the Interface drop down, select “AX88179” and click “Create”. The connection should now appear in the connections list. Select it and click Apply to establish the Ethernet connection.
If you experience any issues with Ethernet or have any questions during these steps, please feel free to contact us at support@landingzone.net.